
Text Classification (Classify)
This Guide Uses the Classify Endpoint.
You can find more information about the endpoint here.
In this section, we show how to use the Classify endpoint to do sentiment classification for the kind of customer satisfaction survey responses an e-commerce website may receive.
The Problem We Want to Solve
For this demo, let's assume that we want to classify a set of reviews for a newly-released feature into positive and negative classes. We might for instance have a review like this:
The item exceeded my expectations
that we want to classify as a positive review.
Naturally, the same techniques that we'll use for this problem can be used for any other task where we want to classify a given text according to a fixed set of classes.
Using Classify For Our Task
Classify takes in example inputs with their labels, as well as the input texts we aim to classify. It then trains a classifier using the power of an embeddings model.
You can either do this with our baseline classification model (described in the next few sections), or you can train a custom classification model for better performance (described in the final section).
Examples
Labeled examples are used to demonstrate the classification task to the model. Examples provide two important pieces of information:
- The inputs and expected outputs for the task we're interested in.
- The number of output classes. Every class should appear in at least one example in the labeled examples.
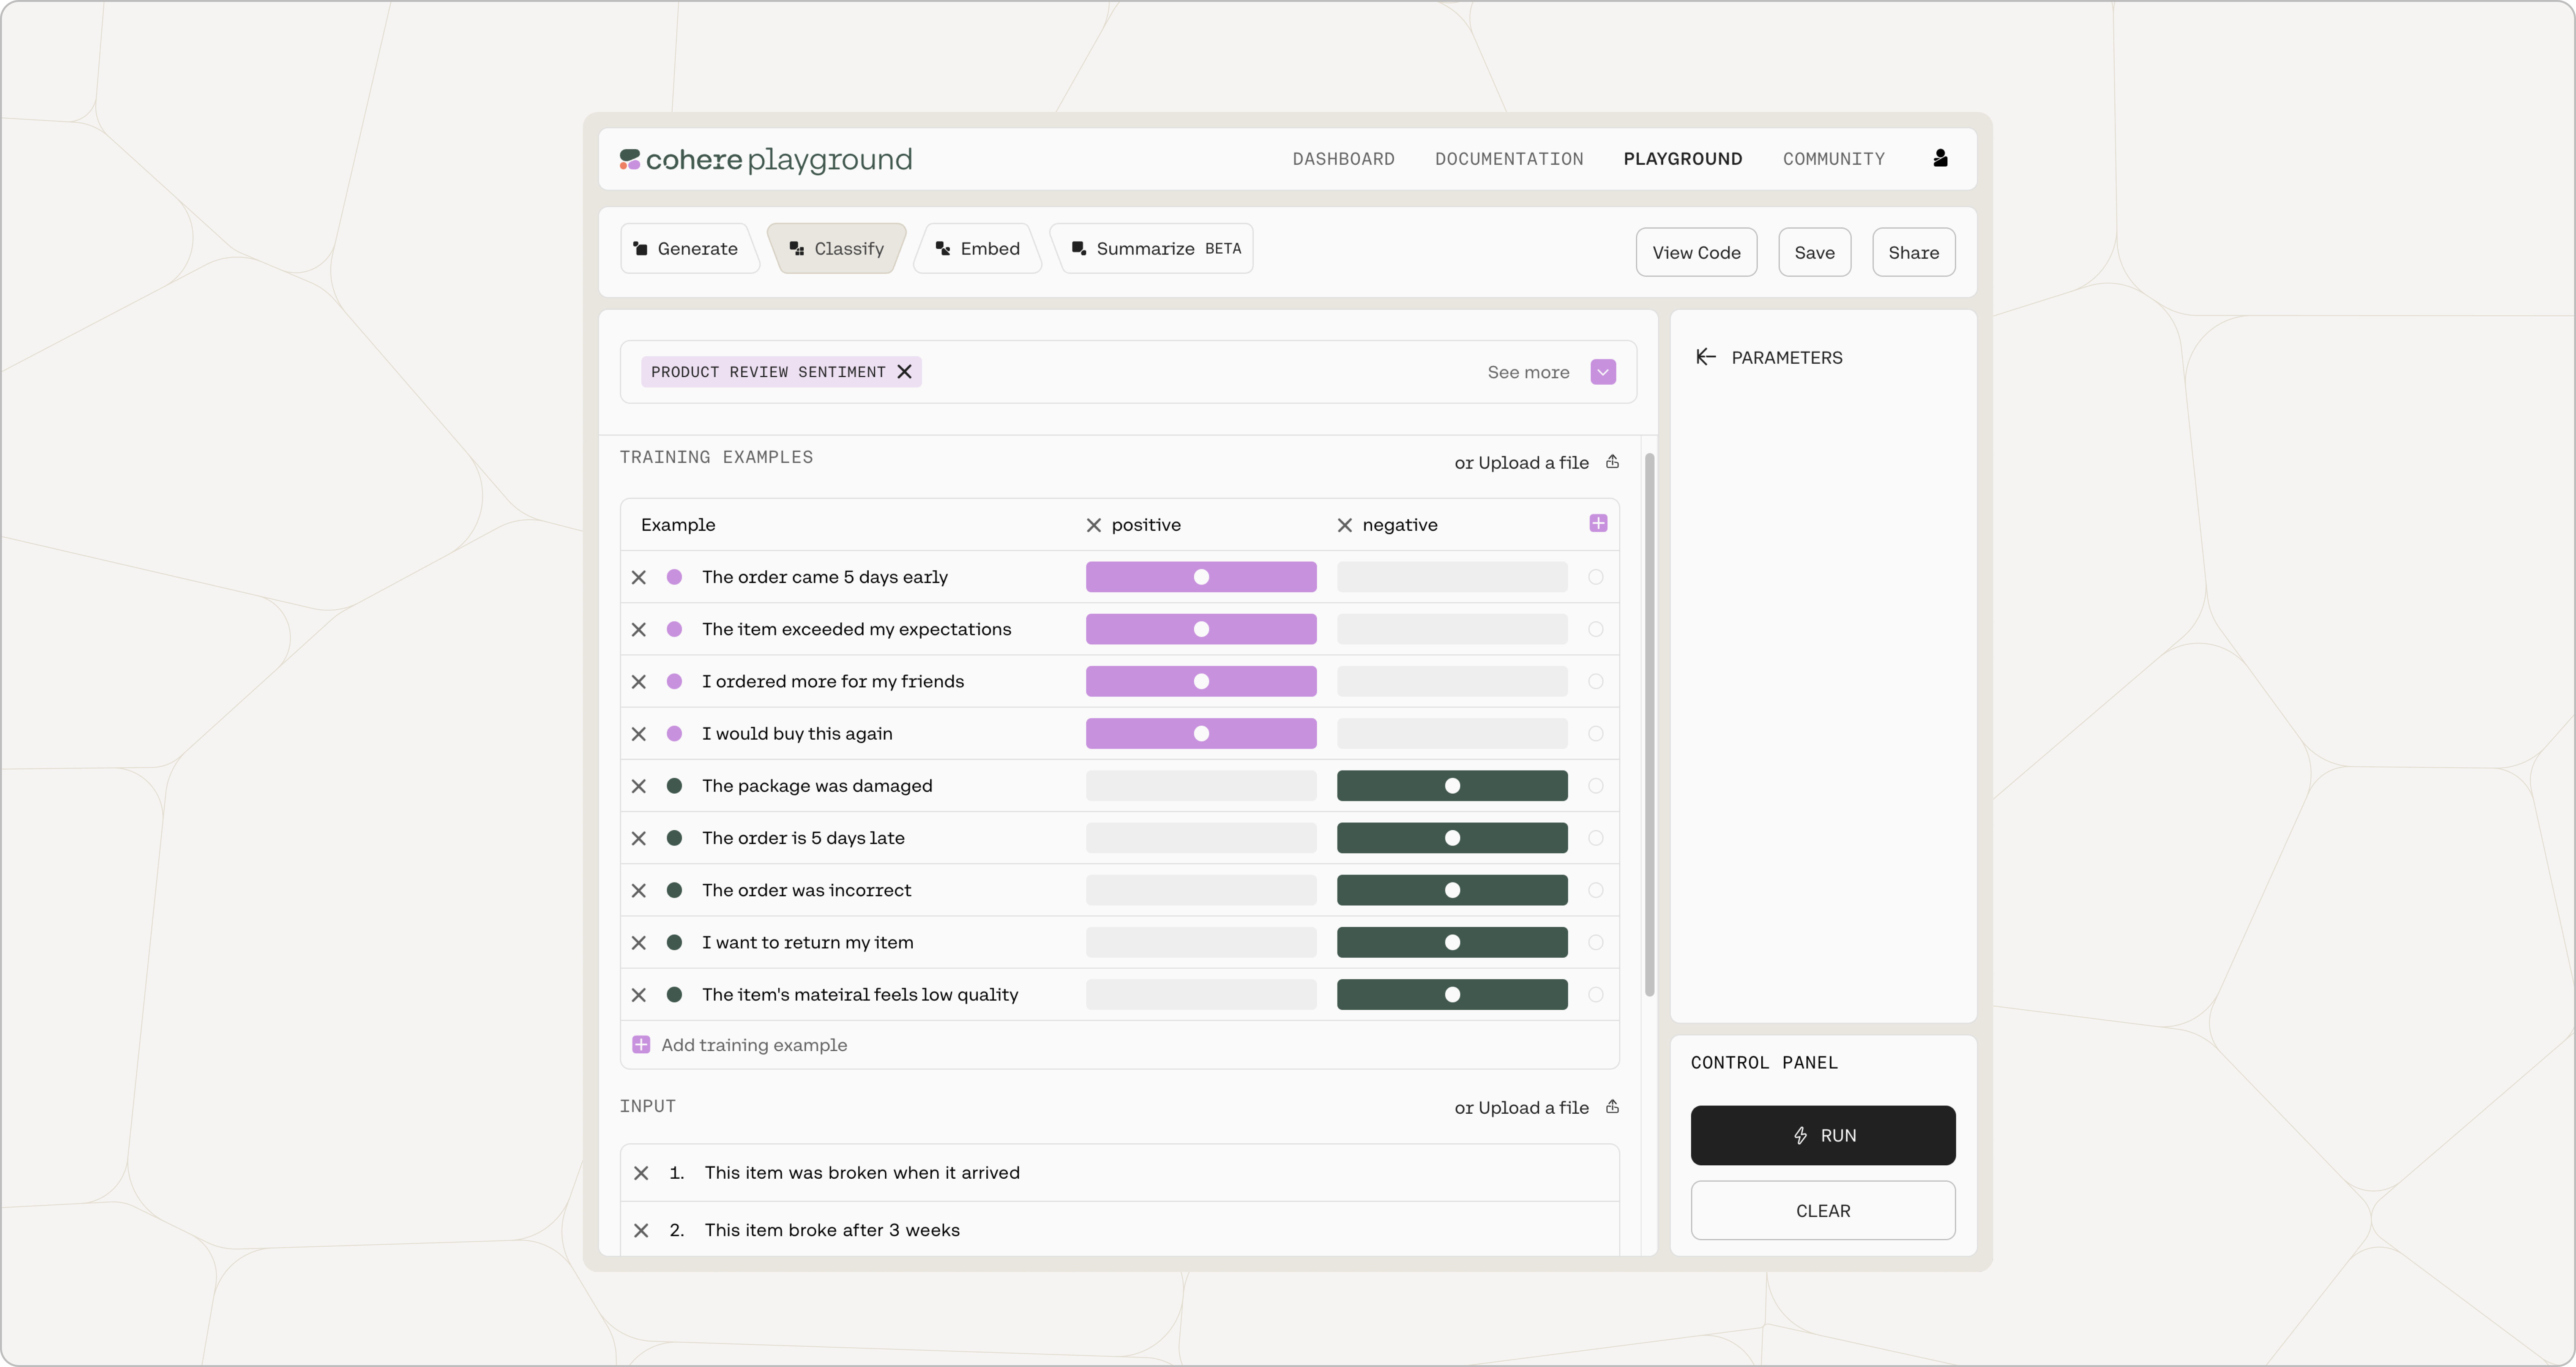
In this case we will be passing in the following examples:
"The order is 5 days late" - negative
"The order came 5 days early" - positive
"I would recommend this to others" - positive
"The package was damaged" - negative
"The order was incorrrect" - negative
"The item exceeded my expectations" - positive
"I want to return my item" - negative
"I ordered more for my friends" - positive
"The item's material feels low quality" - negative
Texts:
These are the input texts that we would like to classify:
"This item was broken when it arrived"
"This item broke after 3 weeks"
Classifying the Input Texts
Adding everything above together, we can call the API with the following arguments:
- model:
embed-english-v2.0 - examples:
[Example("The order is 5 days late","negative"), Example("The order came 5 days early","positive"), Example("I would recommend this to others","positive"), Example("The package was damaged","negative"), Example("The order was incorrect","negative"), Example("The item exceeded my expectations","positive"), Example("I want to return my item","negative"), Example("I ordered more for my friends","positive"), Example("The item's material feels low quality","negative")] - inputs:
["This item was broken when it arrived","This item broke after 3 weeks"]
The corresponding code snippet for the API call is as follows.
import cohere
from cohere import Example
co = cohere.Client('{apiKey}')
classifications = co.classify(
  model='embed-english-v2.0',
  inputs=["This item was broken when it arrived", "This item broke after 3 weeks"],
  examples=[ClassifyExample(text="The order came 5 days early", label="positive"), ClassifyExample(text="The item exceeded my expectations", label="positive"), ClassifyExample(text="I ordered more for my friends", label="positive"), ClassifyExample(text="I would buy this again", label="positive"), ClassifyExample(text="I would recommend this to others", label="positive"), ClassifyExample(text="The package was damaged", label="negative"), ClassifyExample(text="The order is 5 days late", label="negative"), ClassifyExample(text="The order was incorrect", label="negative"), ClassifyExample(text="I want to return my item", label="negative"), ClassifyExample(text="The item\'s material feels low quality", label="negative")])
print('The confidence levels of the labels are: {}'.format(
       classifications.classifications))
It gives us the following values:
"results": [
        {
            "text": "This item was broken when it arrived",
            "prediction": "negative",
            "confidences": [
                {
                    "option": "negative",
                    "confidence": 0.99564105
                },
                {
                    "option": "positive",
                    "confidence": 0.0043589203
                }
            ]
        },
        {
            "text": "This item broke after 3 weeks",
            "prediction": "negative",
            "confidences": [
                {
                    "option": "negative",
                    "confidence": 0.99564105
                },
                {
                    "option": "positive",
                    "confidence": 0.0043589203
                }
            ]
        }
    ]
As expected, our model thinks that both texts are negative.
The playground has a user interface to help you set up the classification prompts, which can then be exported as code.
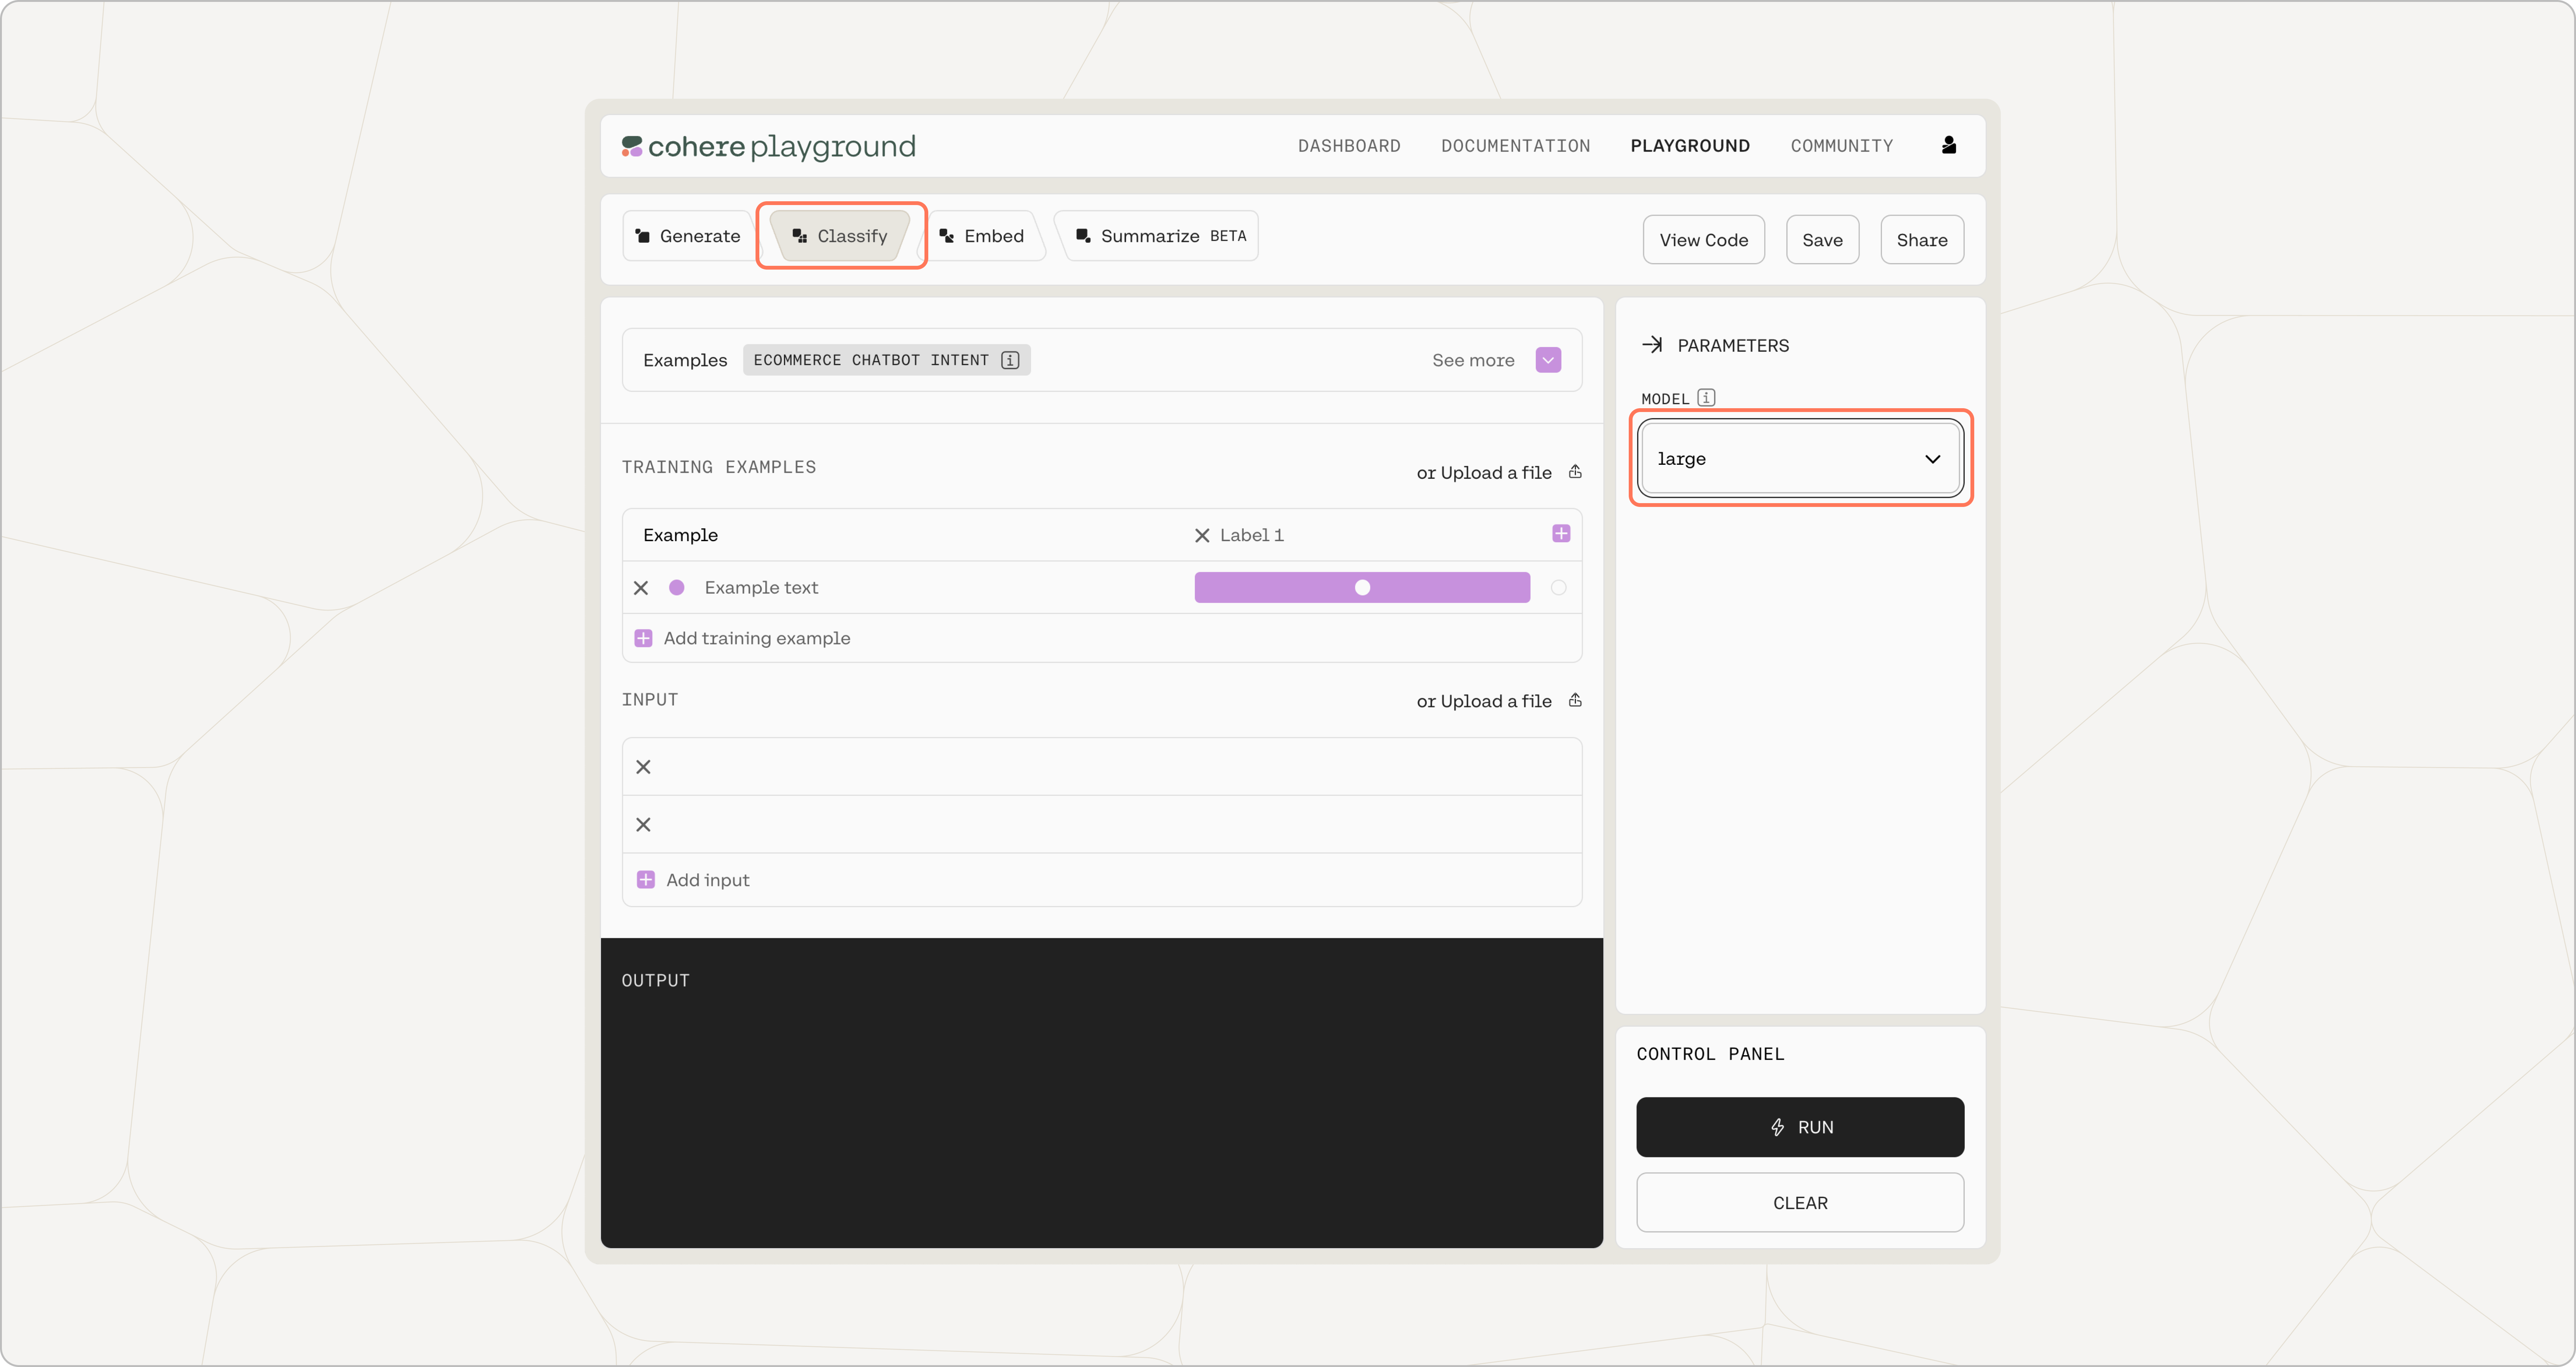
Choose Model
In the Cohere Playground, click on ‘Classify’.
Select the model size of your choice. Our smaller model is faster, while our larger model has a better grasp of language and is more able to capture and replicate the patterns in the input prompt.
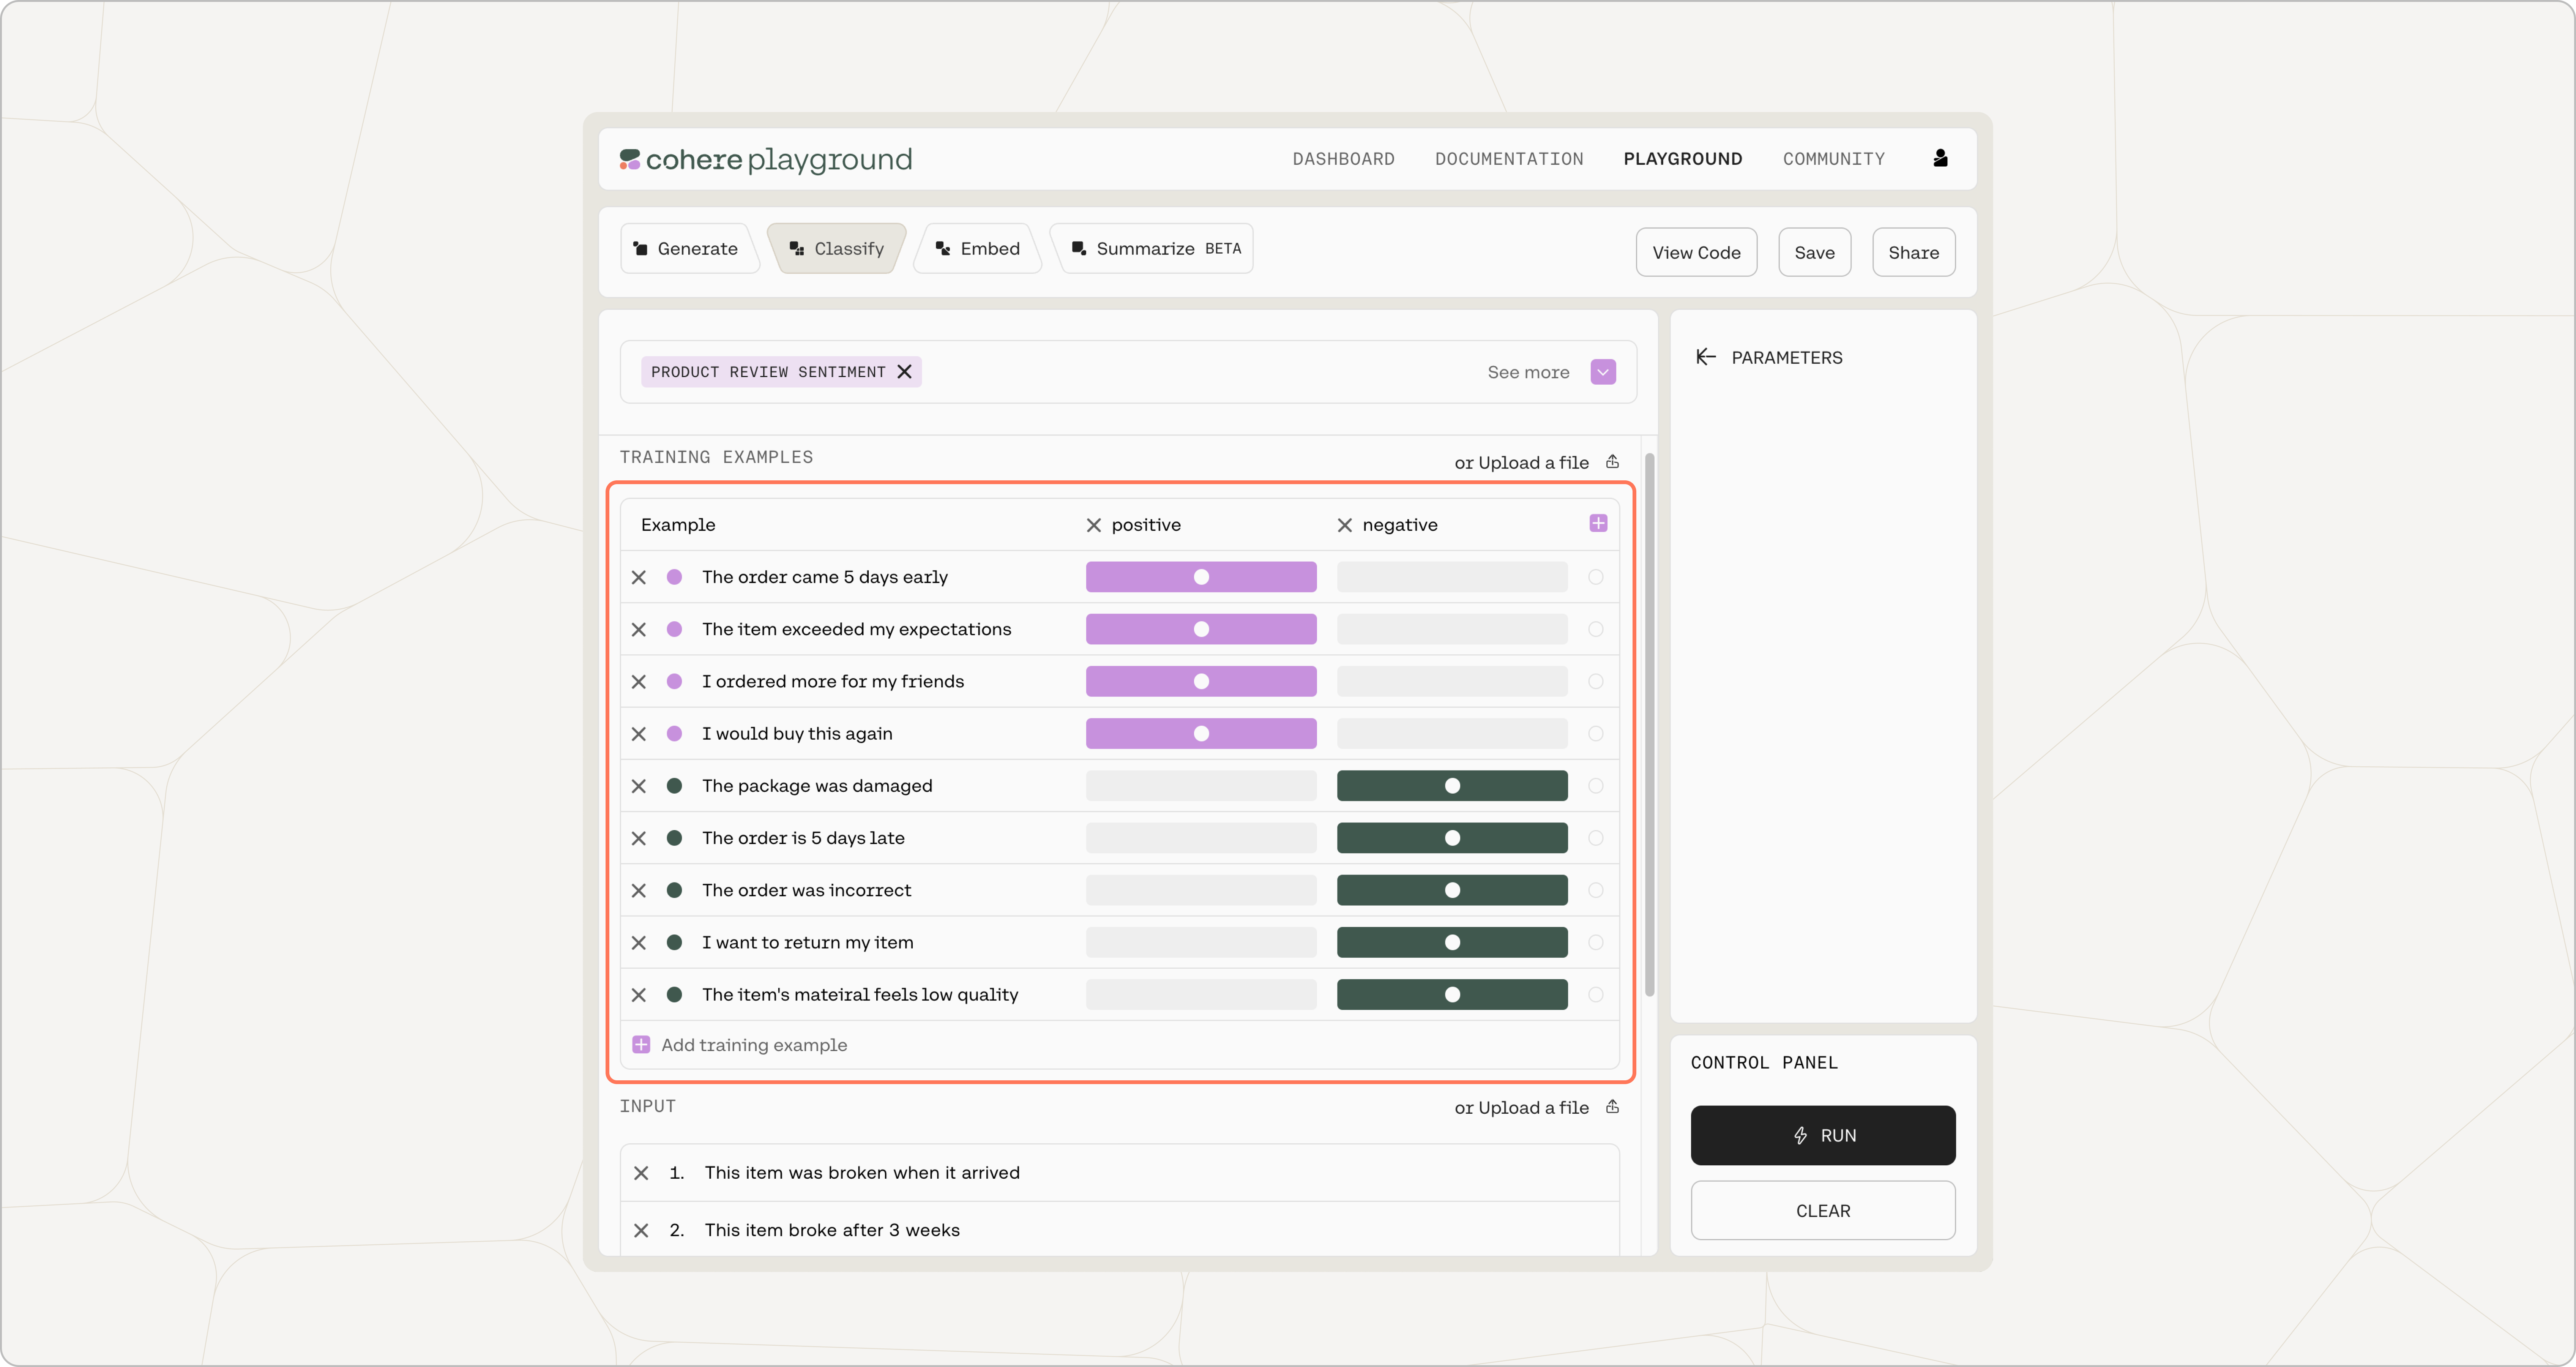
Add Examples
Add your labeled examples in the ‘Examples’ section. The first column is for the examples while the subsequent columns are for the associated labels. Our example here consists of two labels, but there is no limit as to how many labels you can specify.
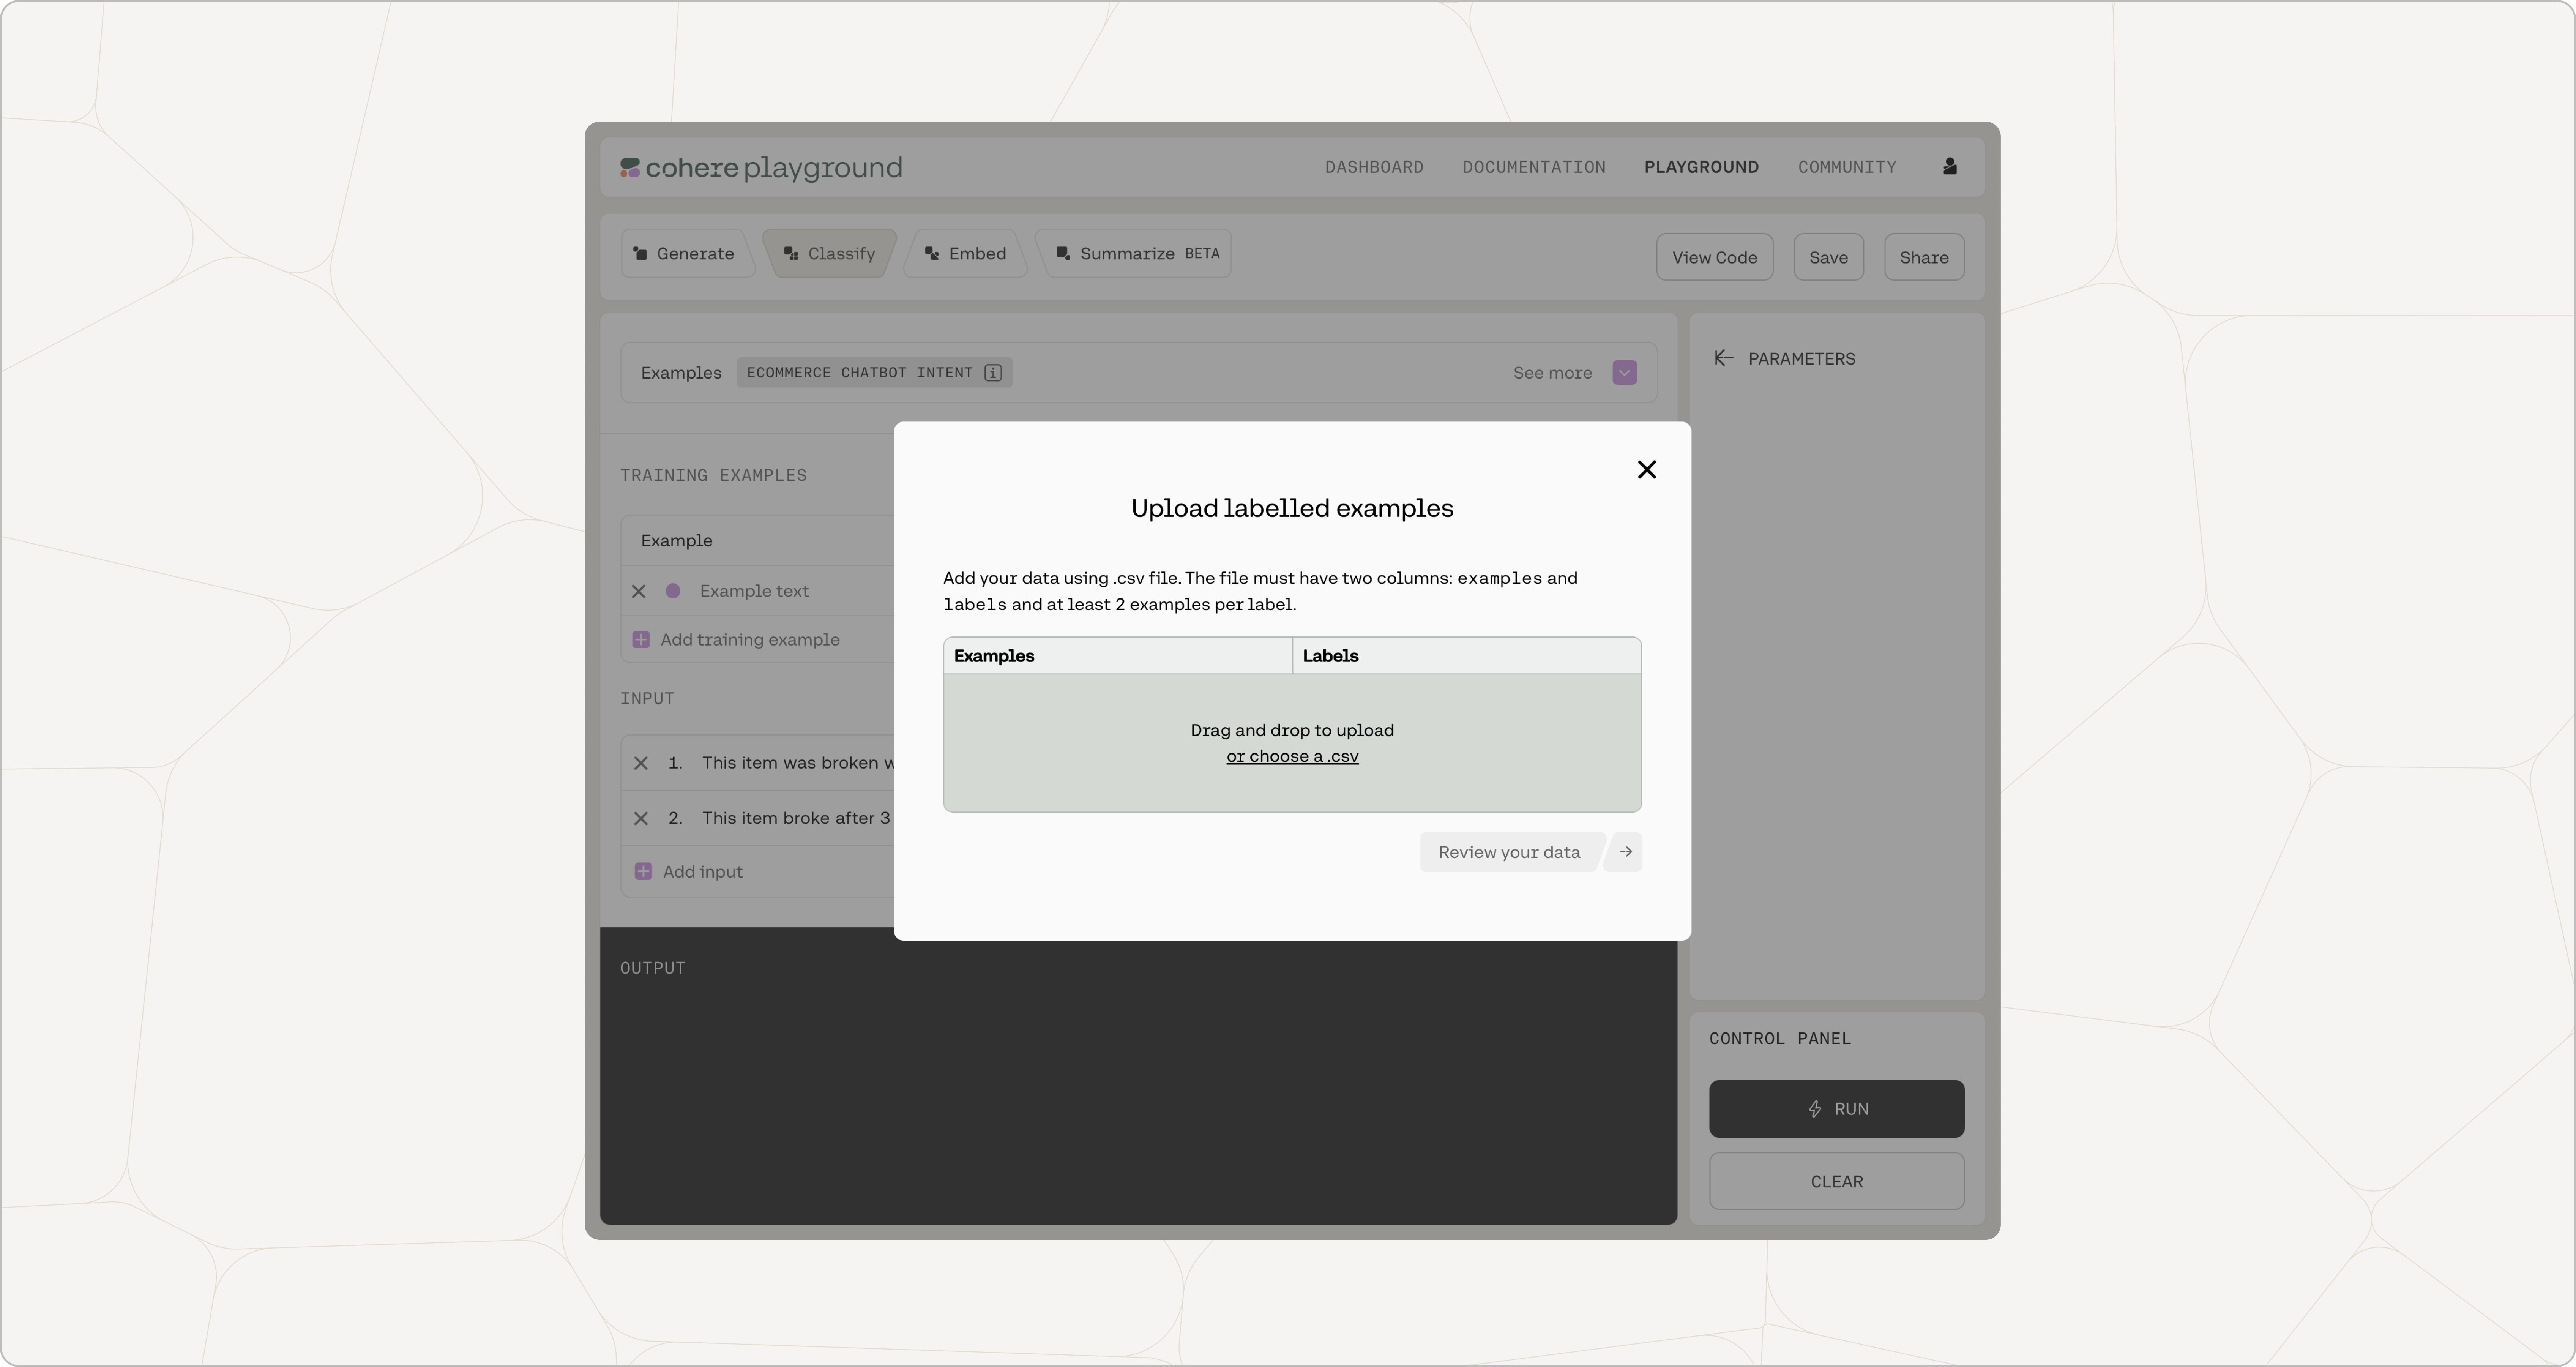
You can also add your labeled examples using a CSV file by selecting upload your labelled examples.
Add at least two examples for each label. The more examples you have, the higher the chance of getting accurate outcomes.
If you are not sure, there are also some preset examples to help you get started.
Add Inputs
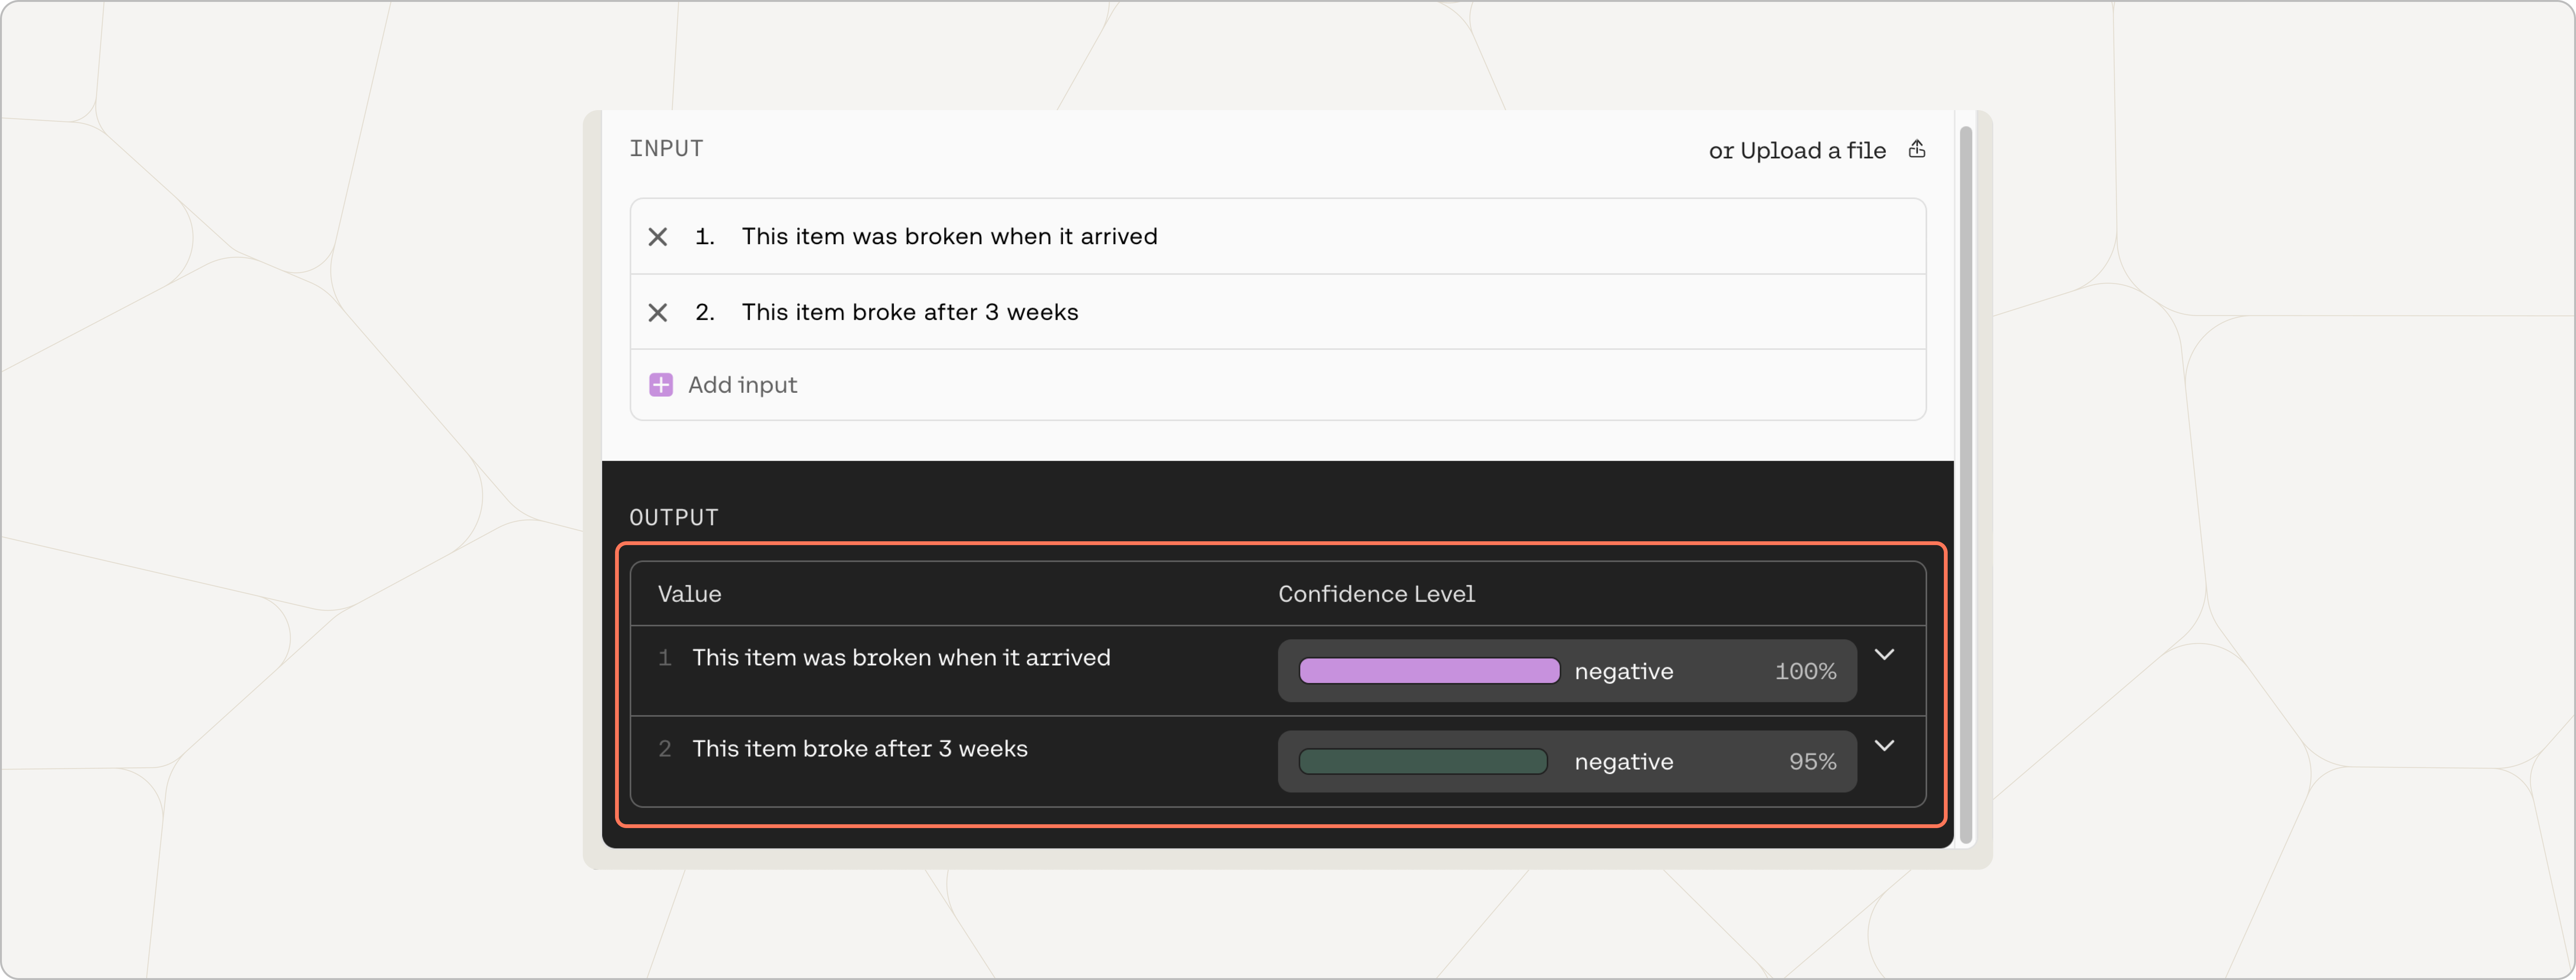
Add the inputs you want to classify in the ‘Inputs’ section. Once done, click on ‘Classify’ to start the classification step.

View Results
Once the classification step is completed, you will see the output labels next to the inputs you added.
In the ‘Results’ section, you will also see the confidence levels associated with each output. The confidence level represents the model's degree of certainty that the query falls under a given label. The label with the highest confidence is chosen.
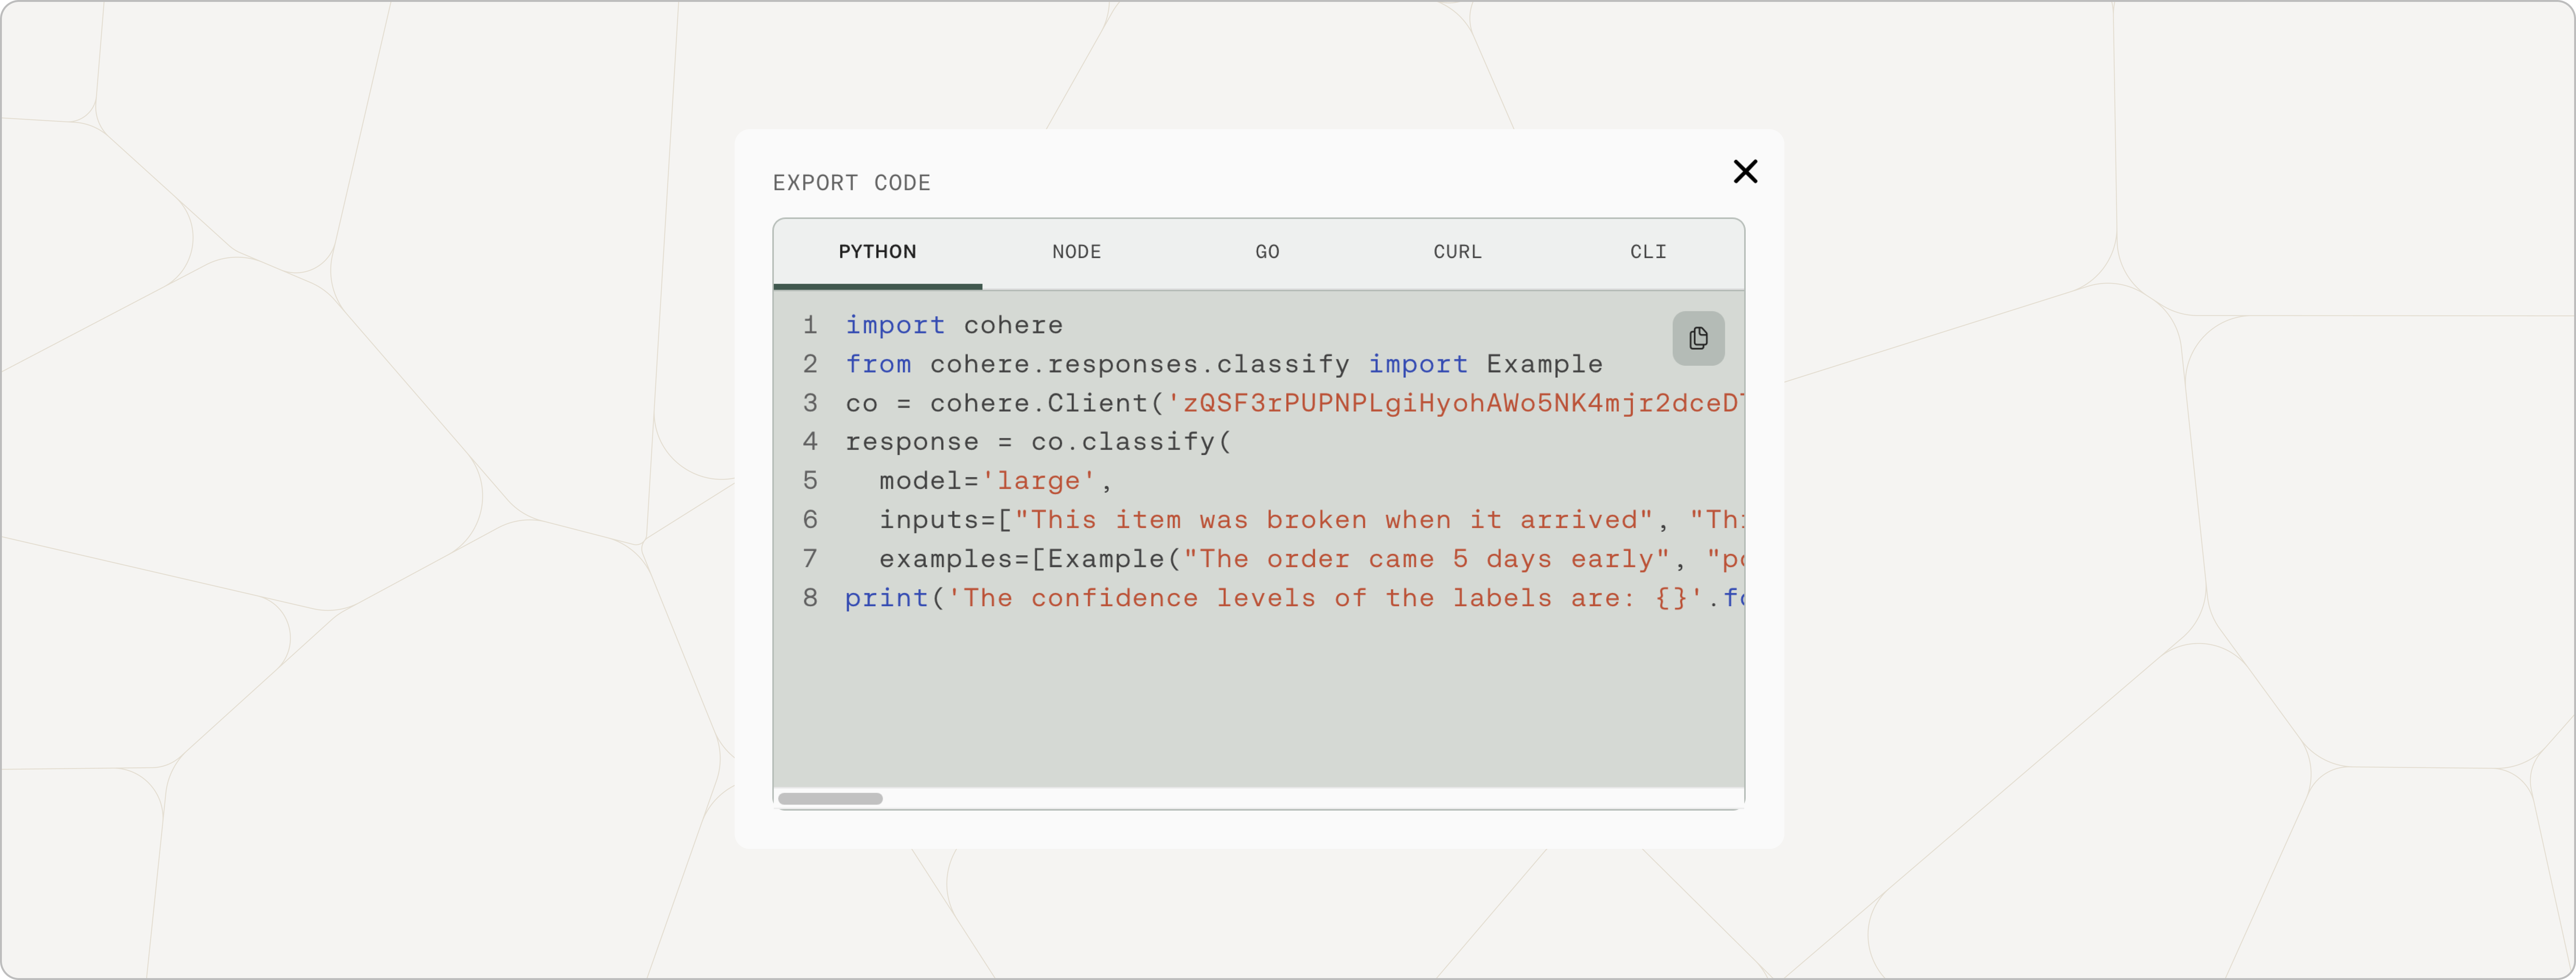
Export Code
Now the code is ready to be exported. Click on ‘Export code’ and you can choose to export from a few different options. You can use this to start integrating the current API configuration to your application.
Training a Custom Classification Model
You can also train a custom classification model if you have a dataset of at least 40 examples (use more for the best results), with at least five examples per label.
A trained model can potentially lead to a better classification performance than a baseline model. See our comprehensive fine-tuning guide to get an overview of what model training is about.
To train a model for your classification task, navigate to the models page and click on Create a custom model.
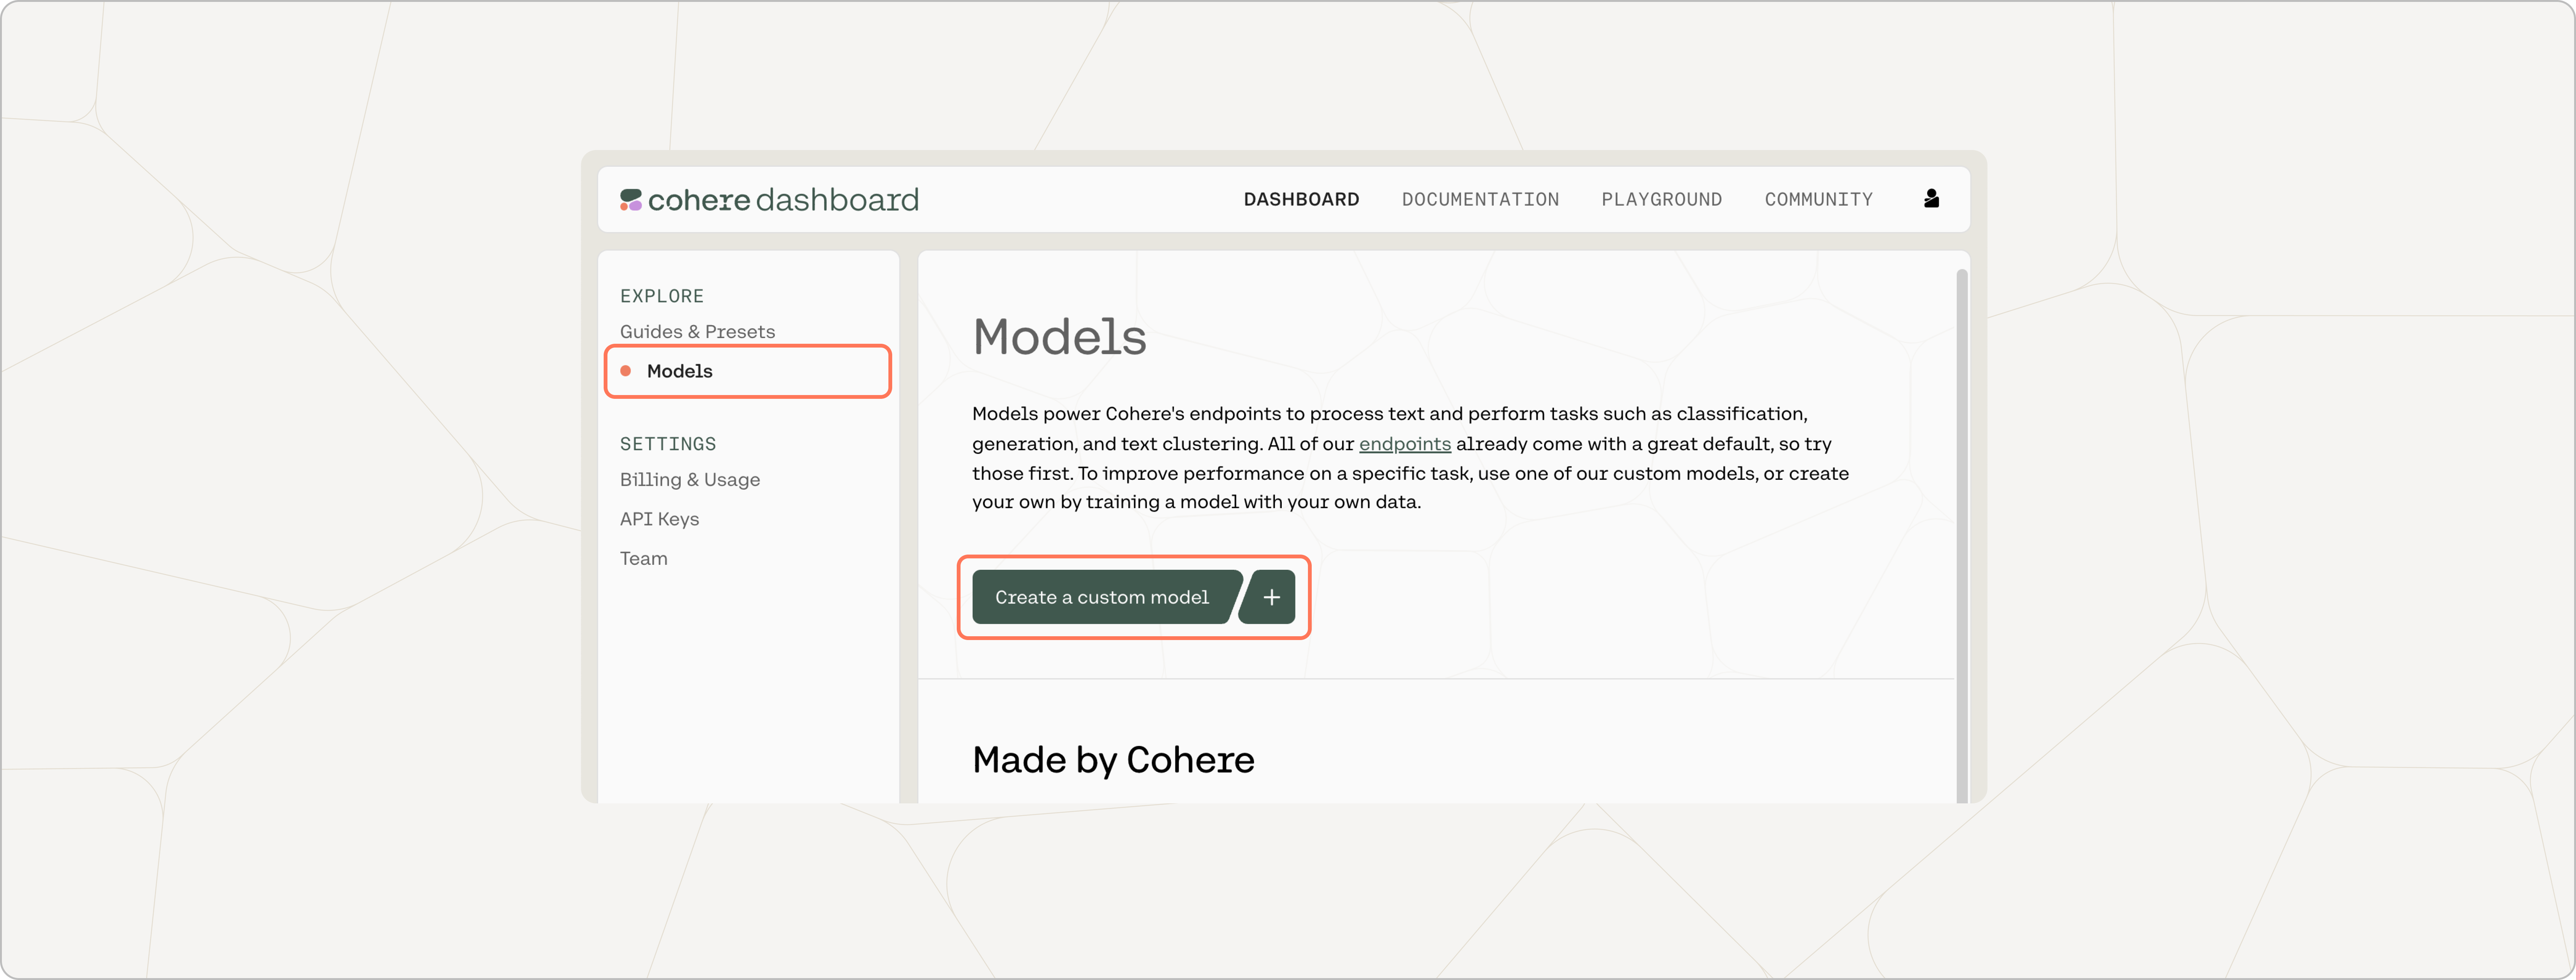
The subsequent steps are the same as those involved in training a classification model, which are described here.
Training a Custom Multilabel Classification Model
The difference between a single-label and multilabel classification model is that the examples given to the latter can have more than label, and the model can consequently output more than one label.
Here's an example, in which the labels indicate which class a statement is related to:
{"text":"About 99% of the mass of the human body is made up of six elements: oxygen, carbon, hydrogen, nitrogen, calcium, and phosphorus.", "label":["biology", "physics"]}
{"text":"The square root of a number is defined as the value, which gives the number when it is multiplied by itself", "label":["mathematics"]}
As you can see, the first piece of text is about the chemical composition of the human body, and could plausibly belong to either a class on biology or a class on physics. The model can ingest examples like these, and then output multiple labels when given new pieces of text.
Updated 15 days ago